Appearance
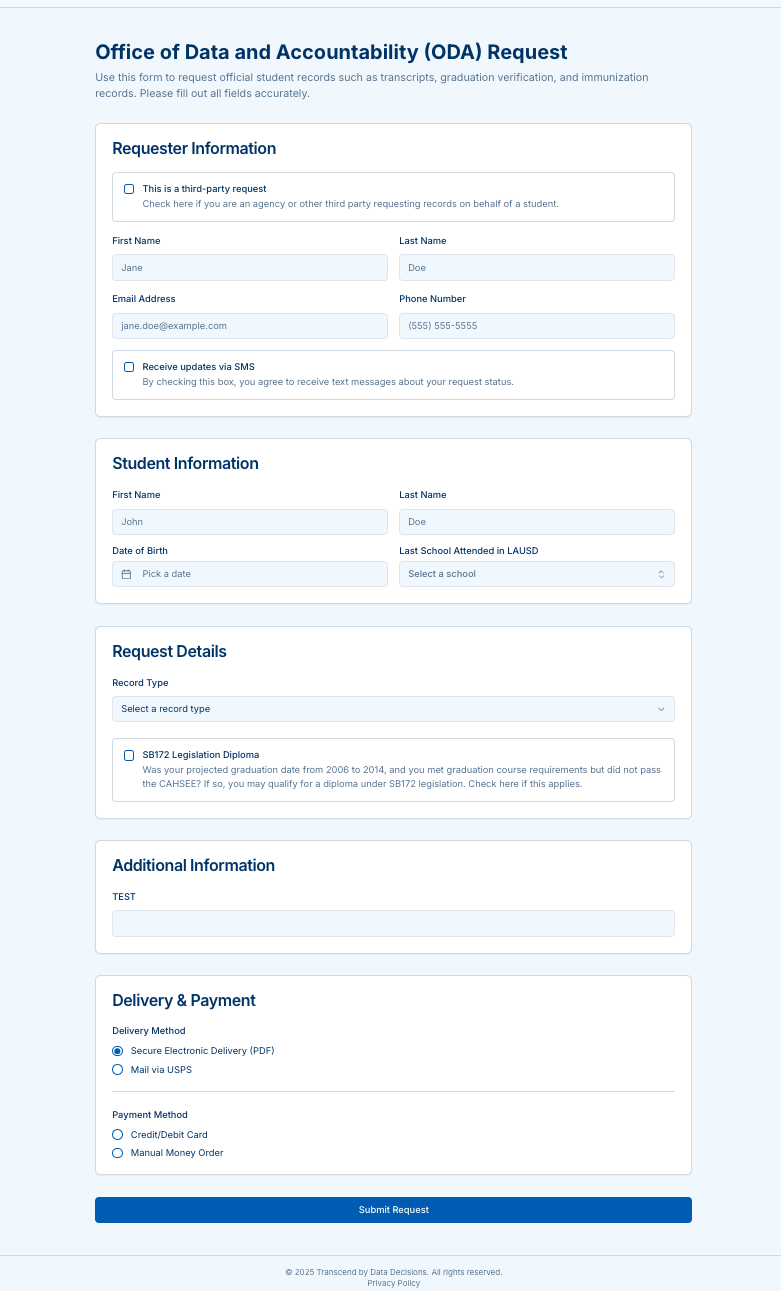
Requesting Records
A step-by-step guide based on the on-screen experience.
Start Your Request
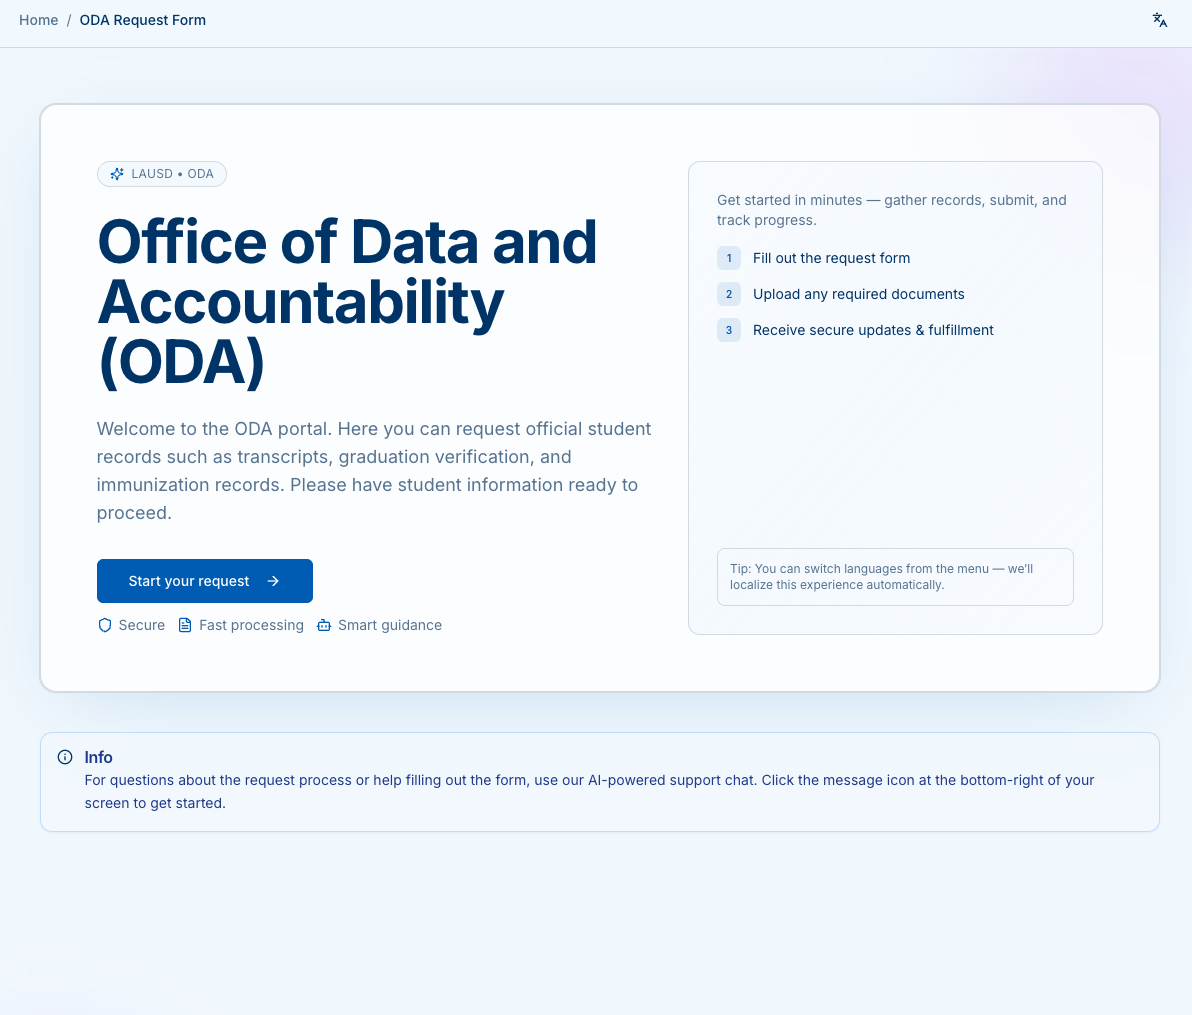
On the landing page, click Start your request.
You’ll see an overview of the process: submitting the form, uploading documents, and receiving secure updates.
Step 1 — Select Who Is Making the Request
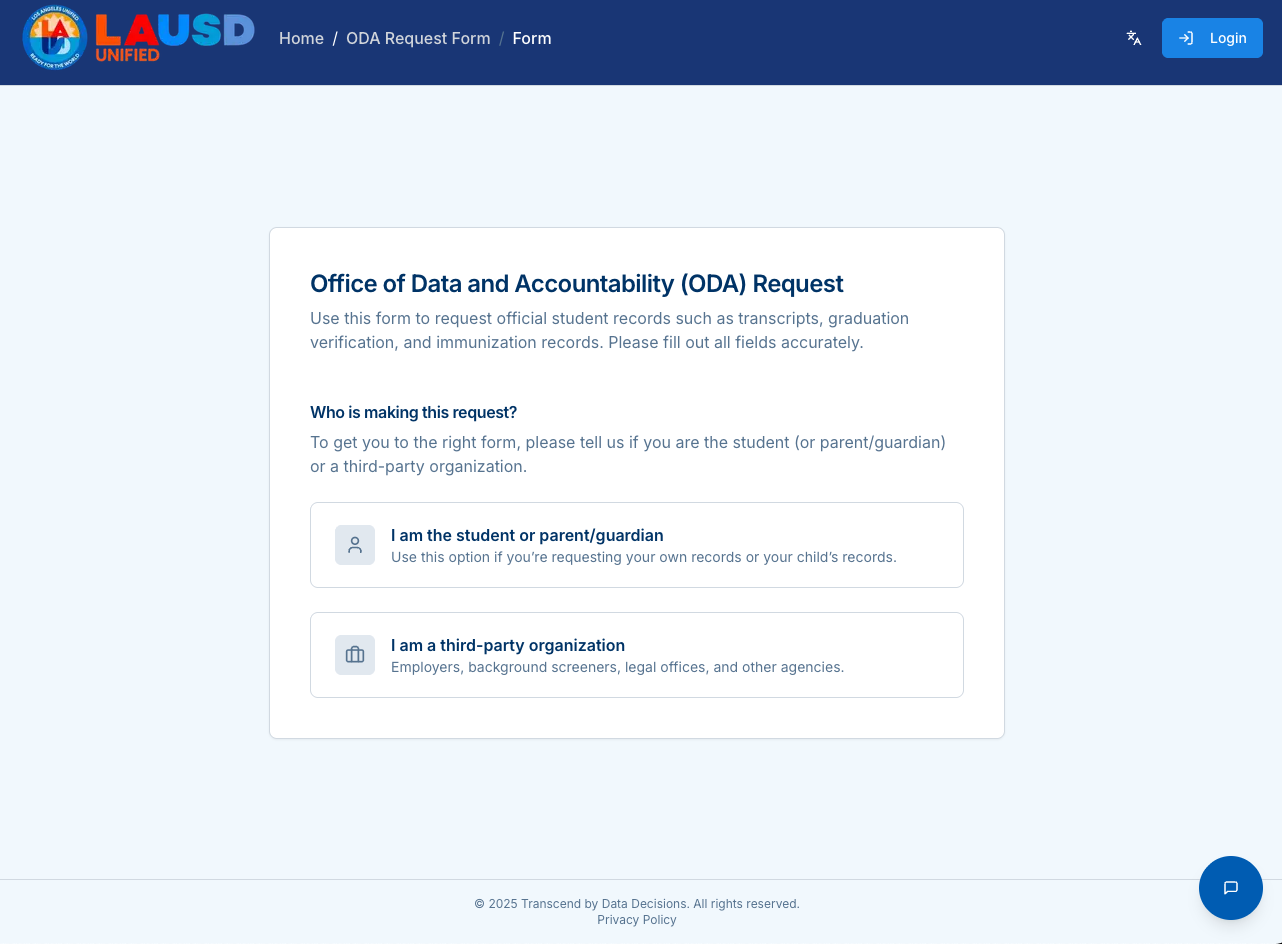
Choose who is submitting the request:
- I am the student or parent/guardian – For personal or your child’s records.
- I am a third-party organization – For employers, legal offices, background screeners, etc.
Step 2 — Student Information
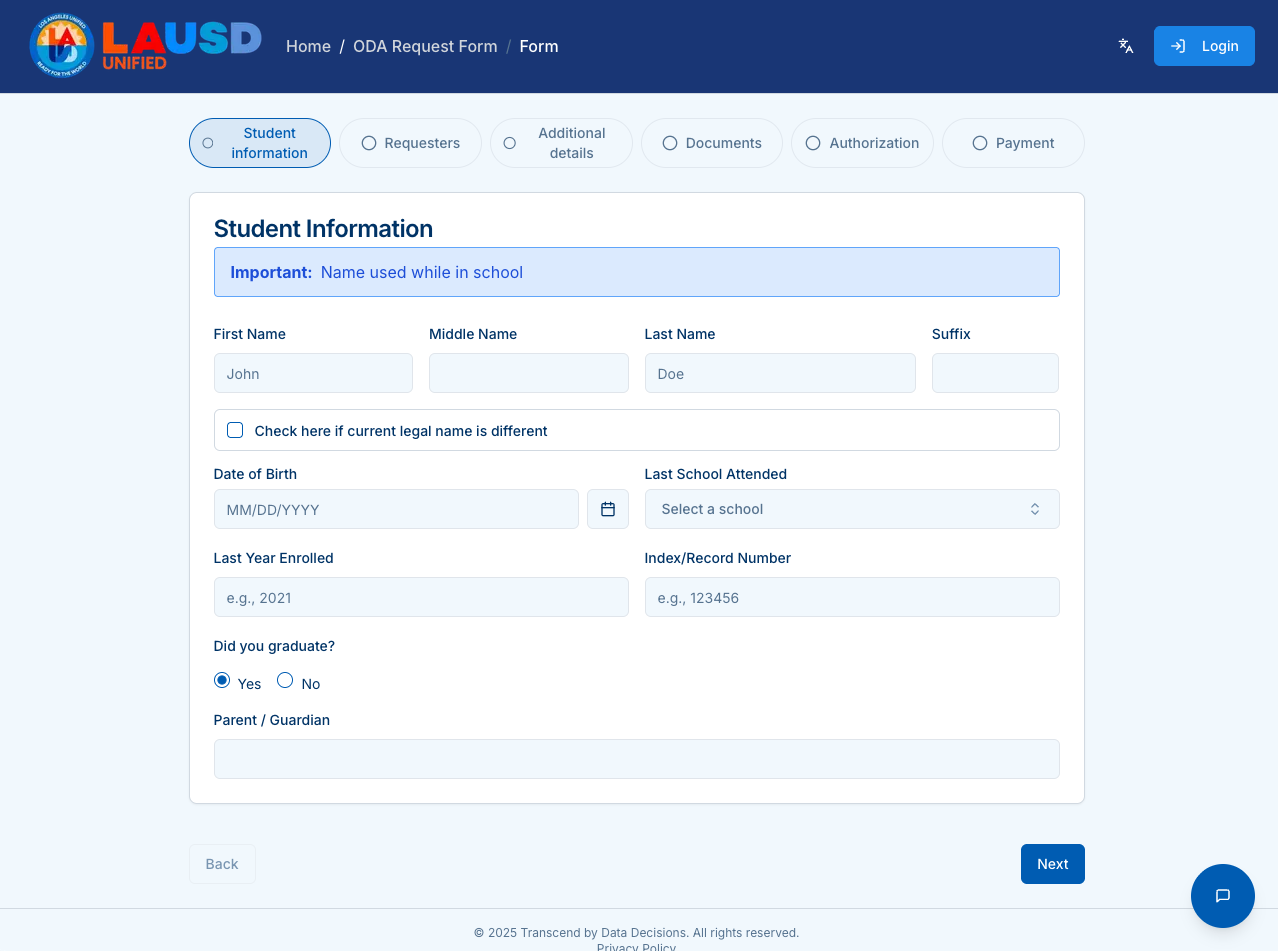
Enter the required student information:
- First, Middle, Last Name (as used in school)
- Optionally indicate if their current legal name is different
- Date of Birth
- Last School Attended (searchable list)
- Last Year Enrolled
- Index/Record Number (if known)
- Graduation status
- Parent/Guardian name (if applicable)
Click Next.
Step 3 — Requester Details
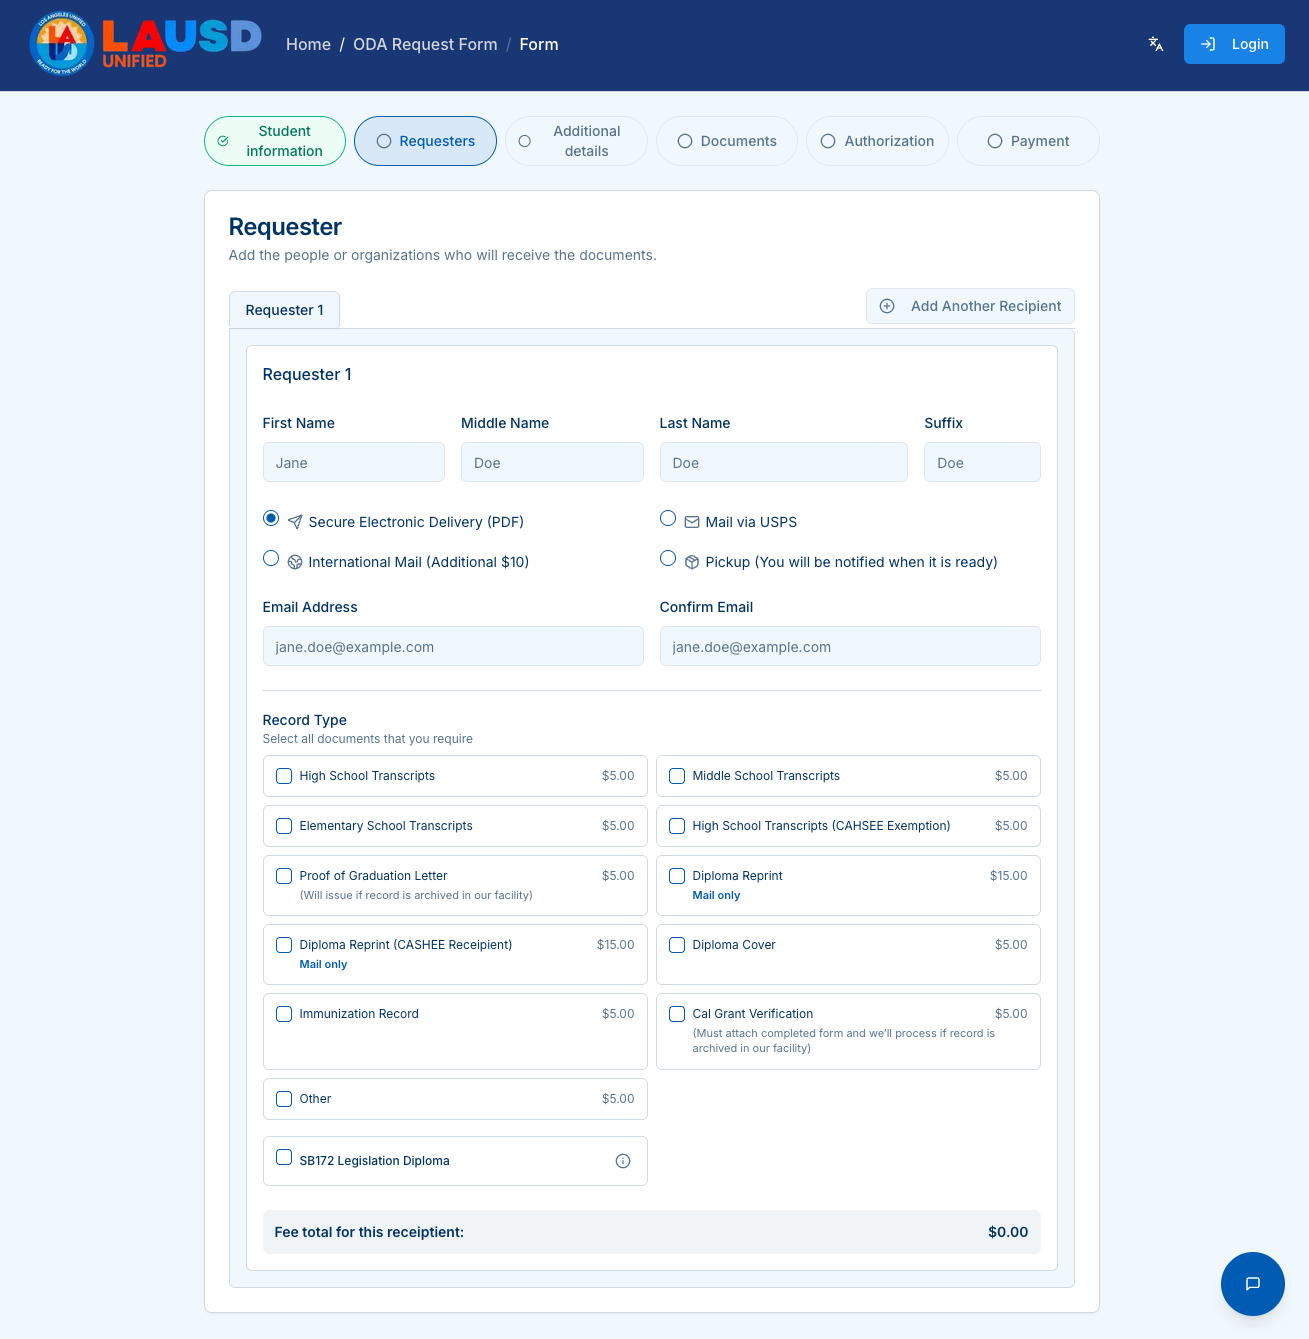
Provide information for the person or organization receiving the documents:
- Name and email
- Delivery method:
- Secure Electronic Delivery (PDF)
- Mail via USPS
- International Mail
- Pickup
Select all Record Types needed (fees shown beside each).
You may also Add Another Recipient.
Click Next.
Step 4 — Additional Details
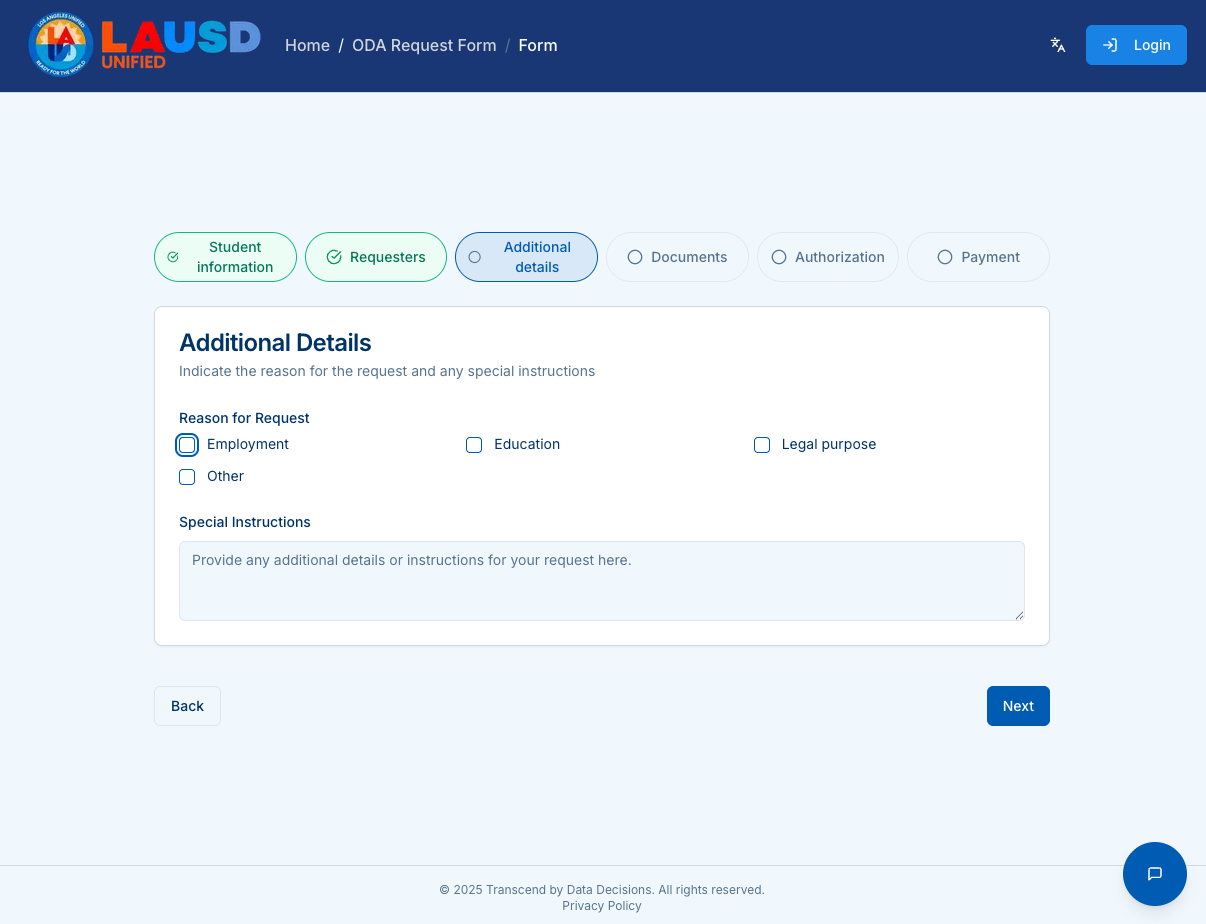
Choose the Reason for Request:
- Employment
- Education
- Legal purpose
- Other
Add any Special Instructions.
Click Next.
Step 5 — Supporting Documents
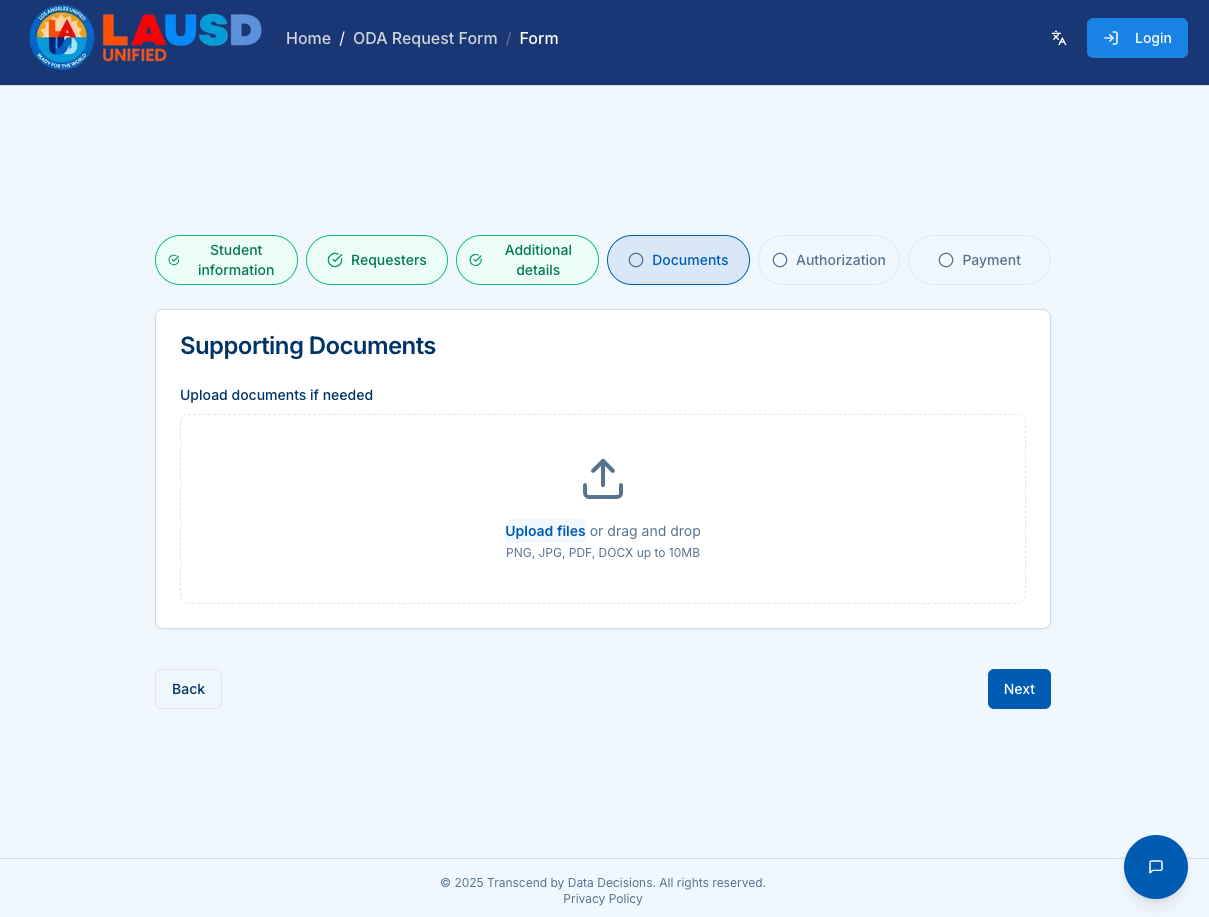
Upload any supporting documents required.
- Allowed file types: PNG, JPG, PDF, DOCX
- Maximum file size: 10MB
Drag and drop files, or click the upload area.
Click Next.
Step 6 — Authorization
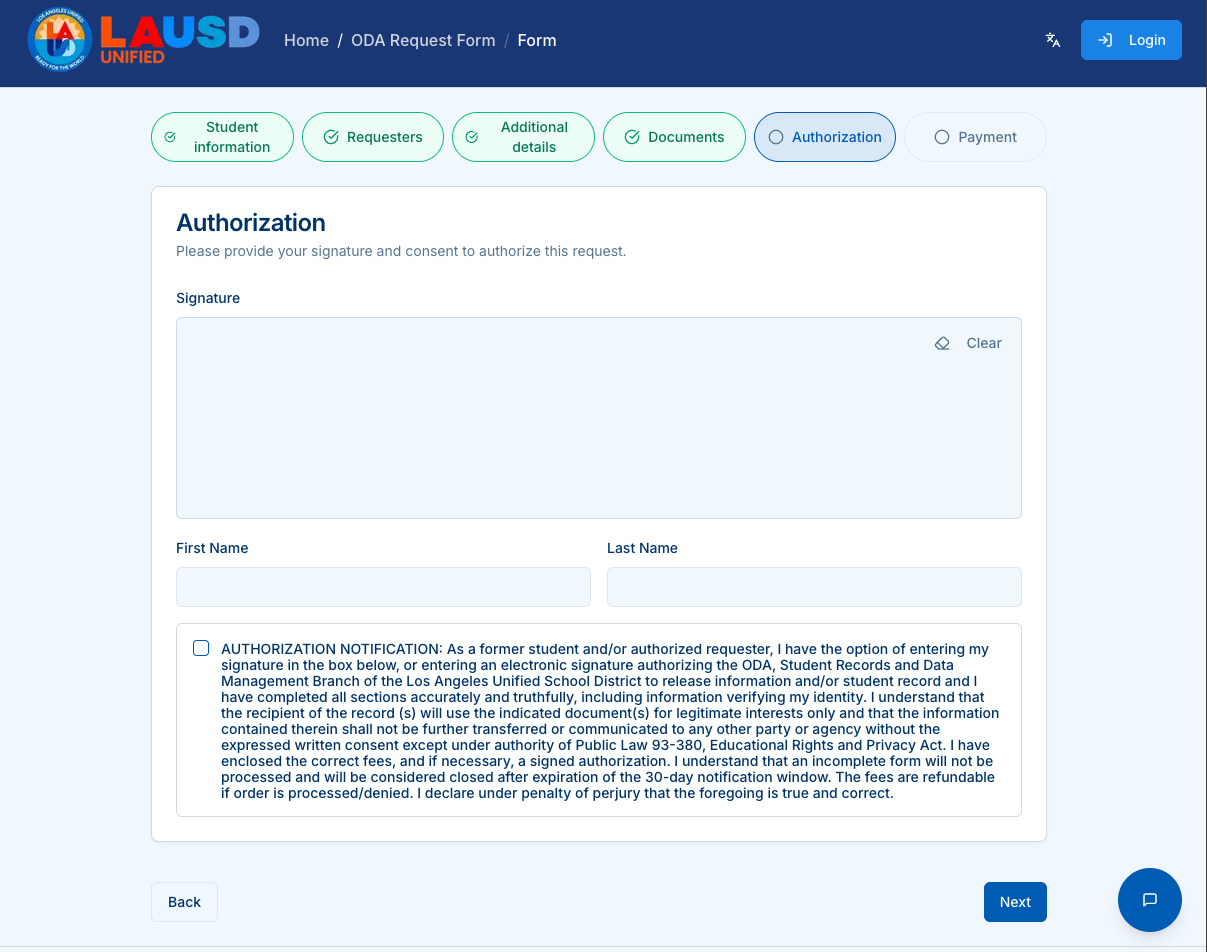
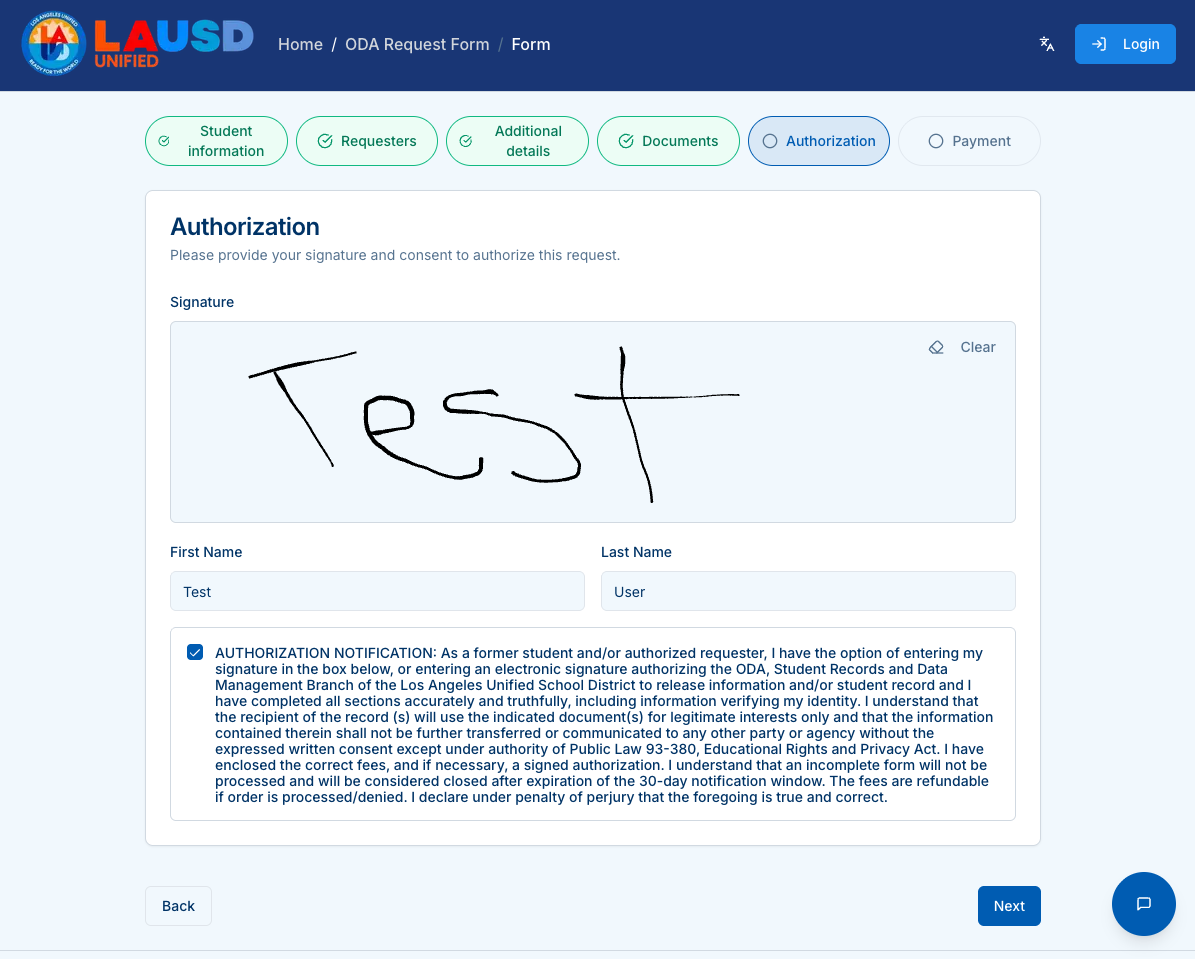
Complete the authorization:
- Draw your signature.
- Enter your First and Last Name.
- Check the required authorization certification box.
Click Next.
Step 7 — Delivery & Payment
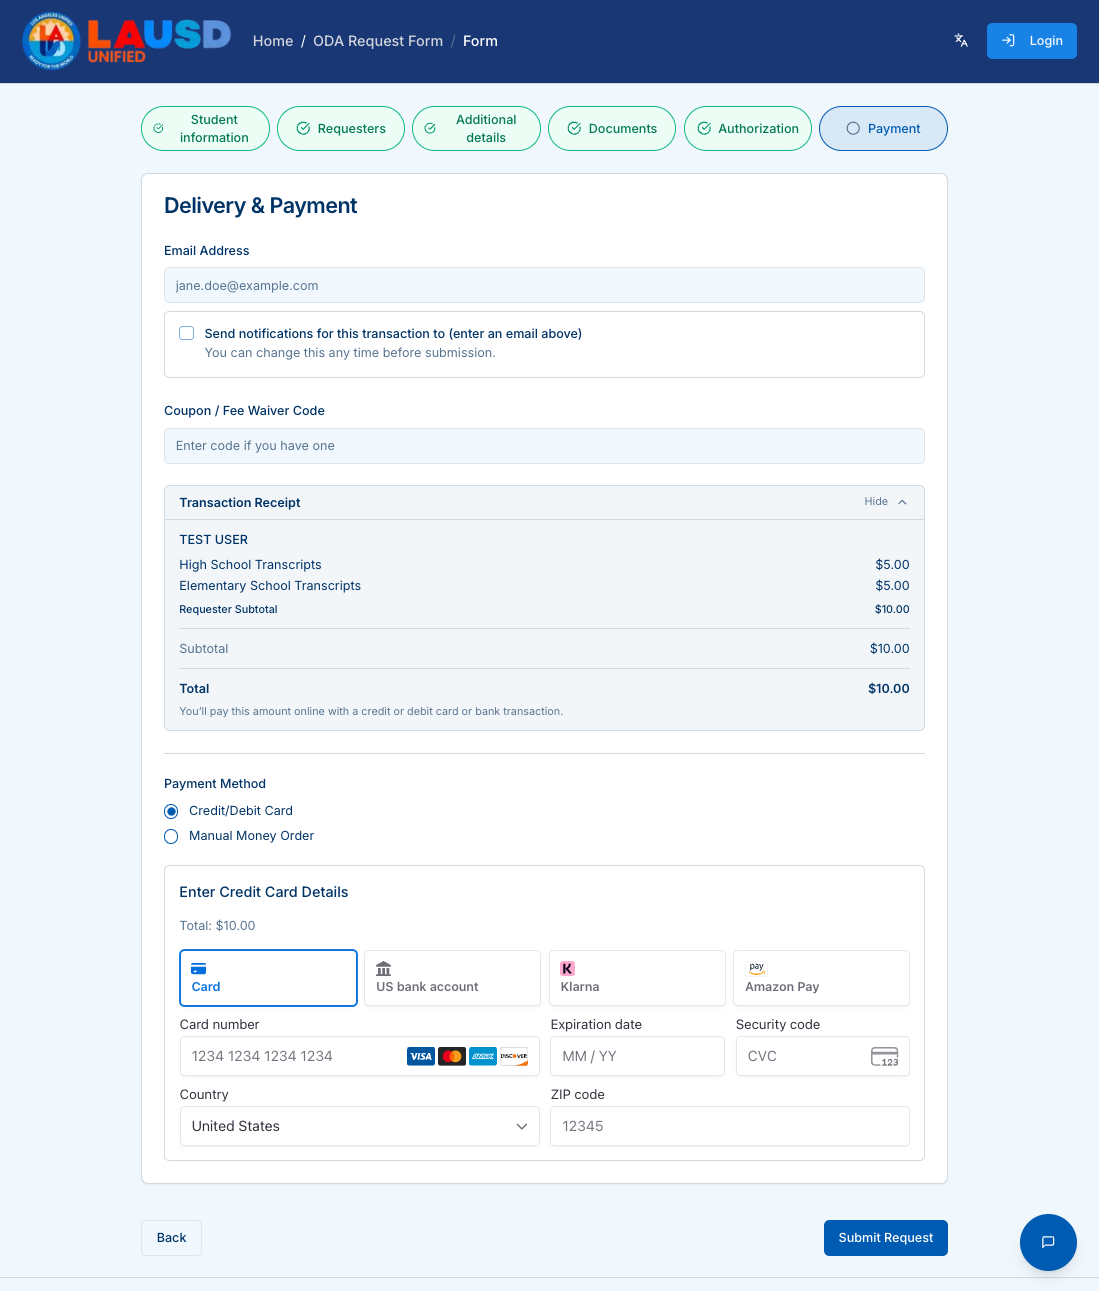
Review your request details and fees, then choose a payment method.
Credit/Debit Card
- Card number
- Expiration date
- Security code
- Billing country and ZIP code
Manual Money Order
Instructions will be provided if selected.
Click Submit Request when ready.
Confirmation & Tracking
After submitting:
- You’ll receive a tracking number.
- Updates are sent via email or SMS (if enabled).
- You can revisit the portal anytime to track your request.